Get a Public URL in 1 Minute with Cloudflare (No Server, No Port Forwarding)
Without buying a server or opening any ports, you can use Cloudflare to expose your local n8n service to the public internet — and even unlock more advanced use cases along the way.
Today, I want to share a practical guide on configuring a public domain for n8n, so your locally running n8n instance can be accessed from anywhere.
The key point is: there’s also a completely free way to do this.
In this article, I’ll introduce two approaches:
- Generating a free, publicly accessible domain
- Purchasing and configuring a custom domain on Cloudflare
Note
Before diving into this guide, you should already have experience installing and running n8n locally.
If not, you can first read my previous article:
Free Version
Let’s start by looking at how to generate a public domain for free and point it to your locally running n8n service.
Step 1: Download cloudflared
First, download cloudflared.
Open your terminal and run the following command.
macOS:
brew install cloudflared
Windows:
Download and install the package from the link below:
https://github.com/cloudflare/cloudflared/releases/latest/download/cloudflared-windows-amd64.msi
Step 2: Create a Temporary Tunnel
Next, create a temporary tunnel based on your local n8n address
(in my case, n8n is running on port 5678):
cloudflared tunnel --url http://localhost:5678
In the terminal output, you’ll see something like this:
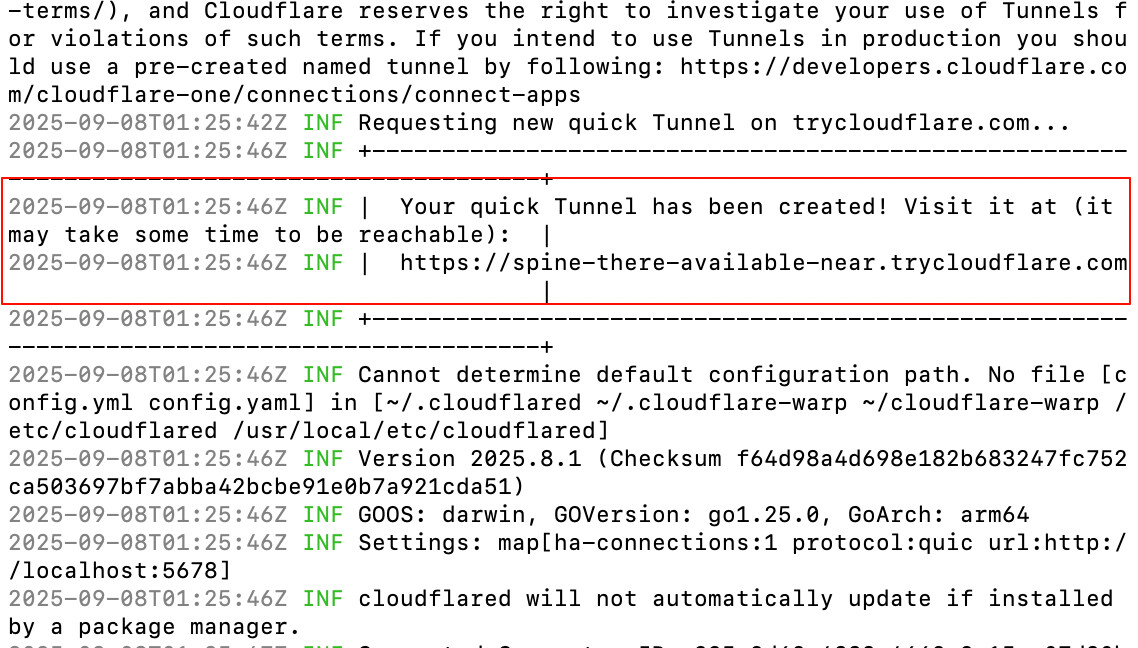
This indicates that a temporary tunnel has been successfully created, and Cloudflare provides a public domain name.
Simply copy that URL, paste it into your browser, and you can access your local n8n directly.
Limitation of the Free Version
The free version has one major drawback:
Every time you stop the cloudflared process and start it again, the generated domain will change.
This makes it great for testing or temporary use, but not ideal for long-term or stable access.
Buying a Domain
If you don’t want to rely on the free version, let’s look at how to purchase a domain on Cloudflare
(prices usually range from $7 to $70 per year, depending on the TLD).
Step 1: Register a Cloudflare Account
Go to https://dash.cloudflare.com/ and register an account.
In my case, I logged in using a Google account.
Then, in the left sidebar, navigate to:
Domain Registration → Register Domains

Step 2: Search and Purchase a Domain
In the input box on the right, enter the domain name you want, for example:
nanobanana.ai
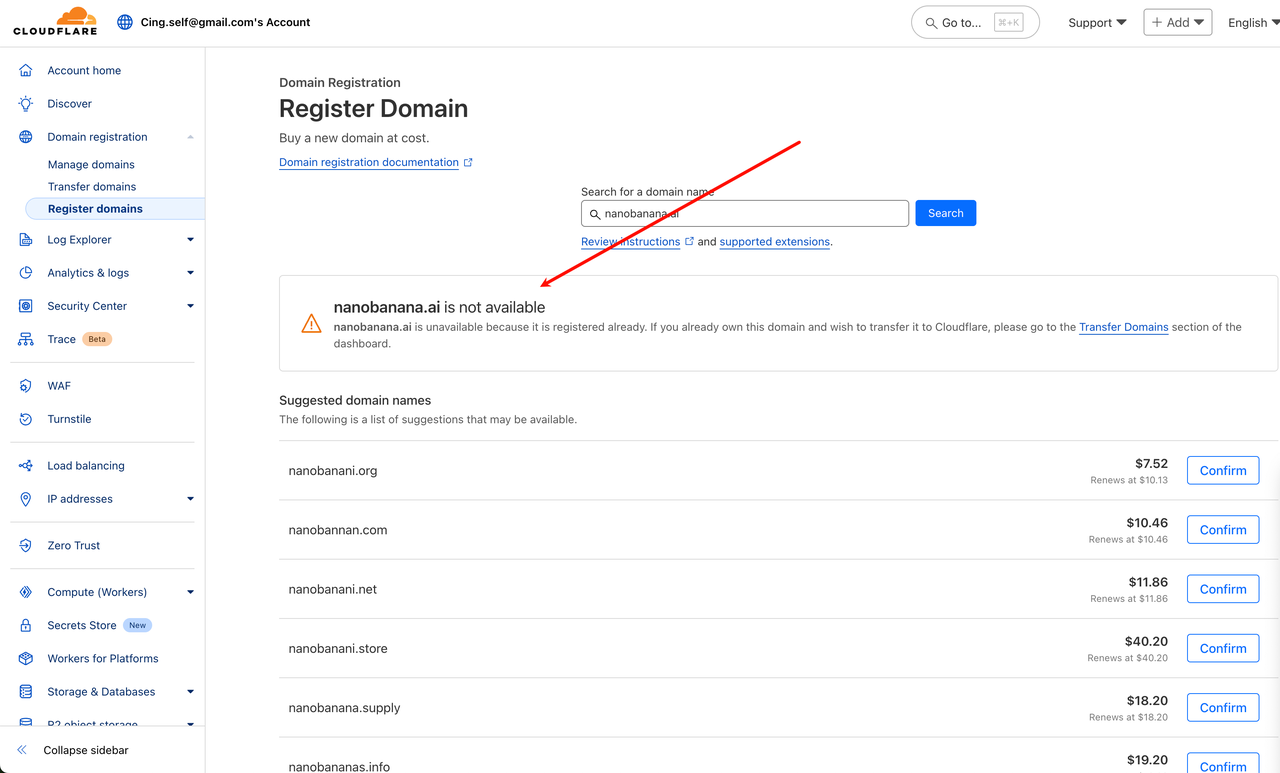
If the domain is unavailable, Cloudflare will show a message like
“xxxxxxxx is not available” and suggest alternative domains along with their prices.
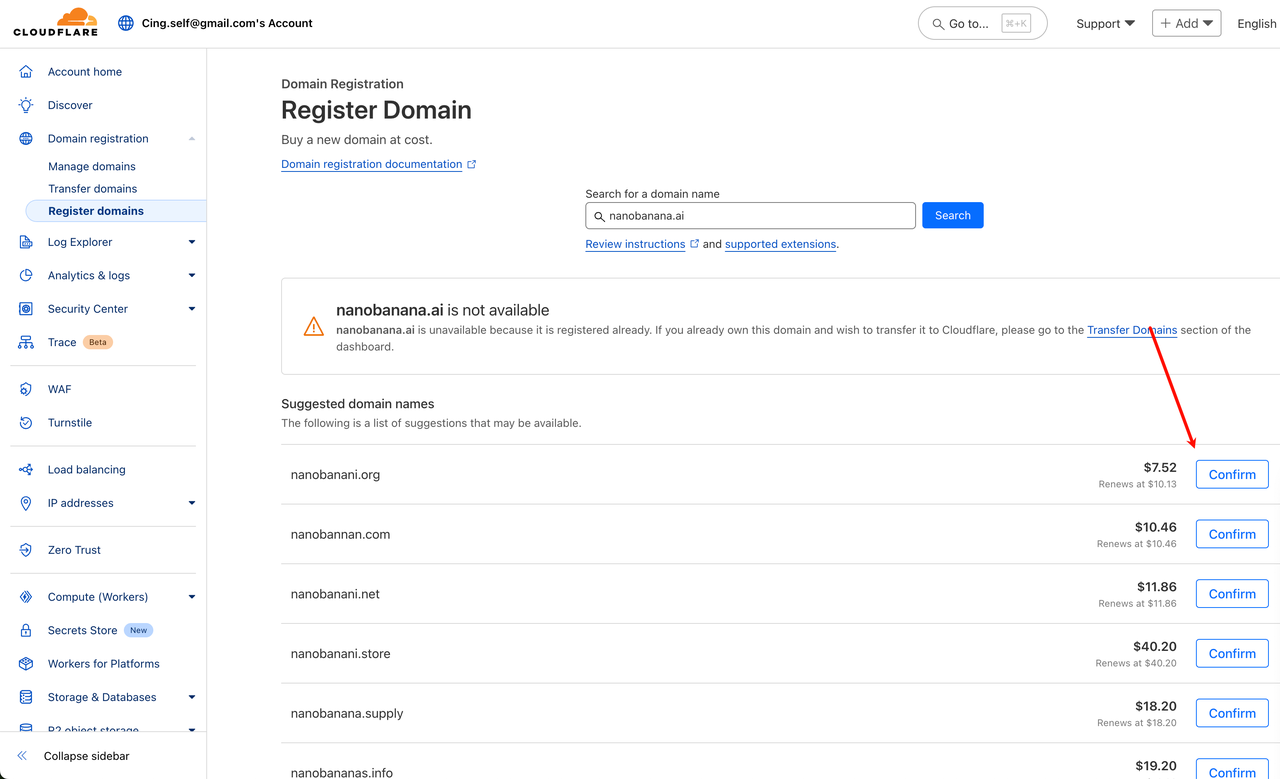
Different TLDs have different prices. For example, .ai domains are quite popular right now and usually cost $70+ per year.
Once you select a domain, click Confirm.
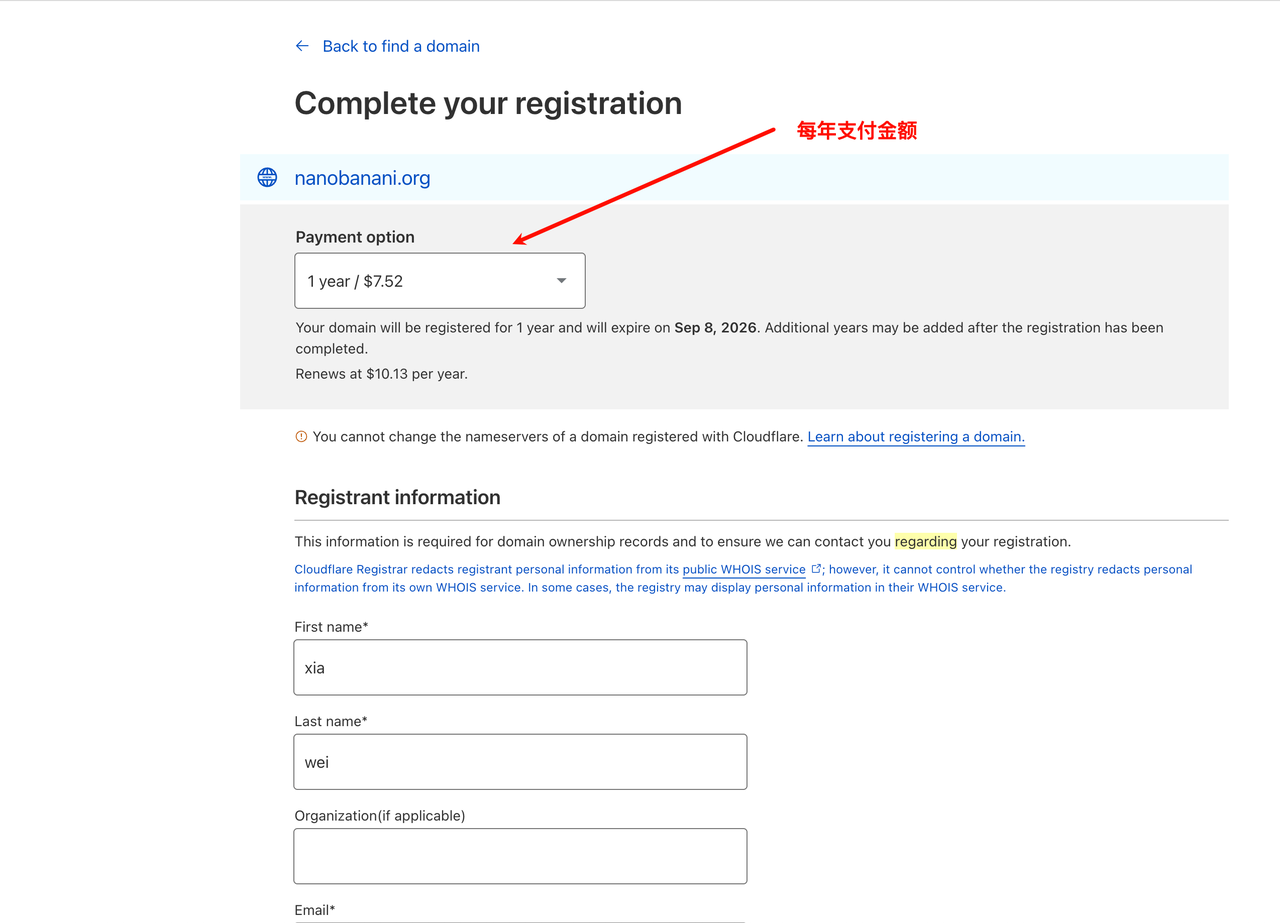
On the confirmation page, you’ll see the total price.
Fill in your personal information, address, and payment details, then complete the payment.
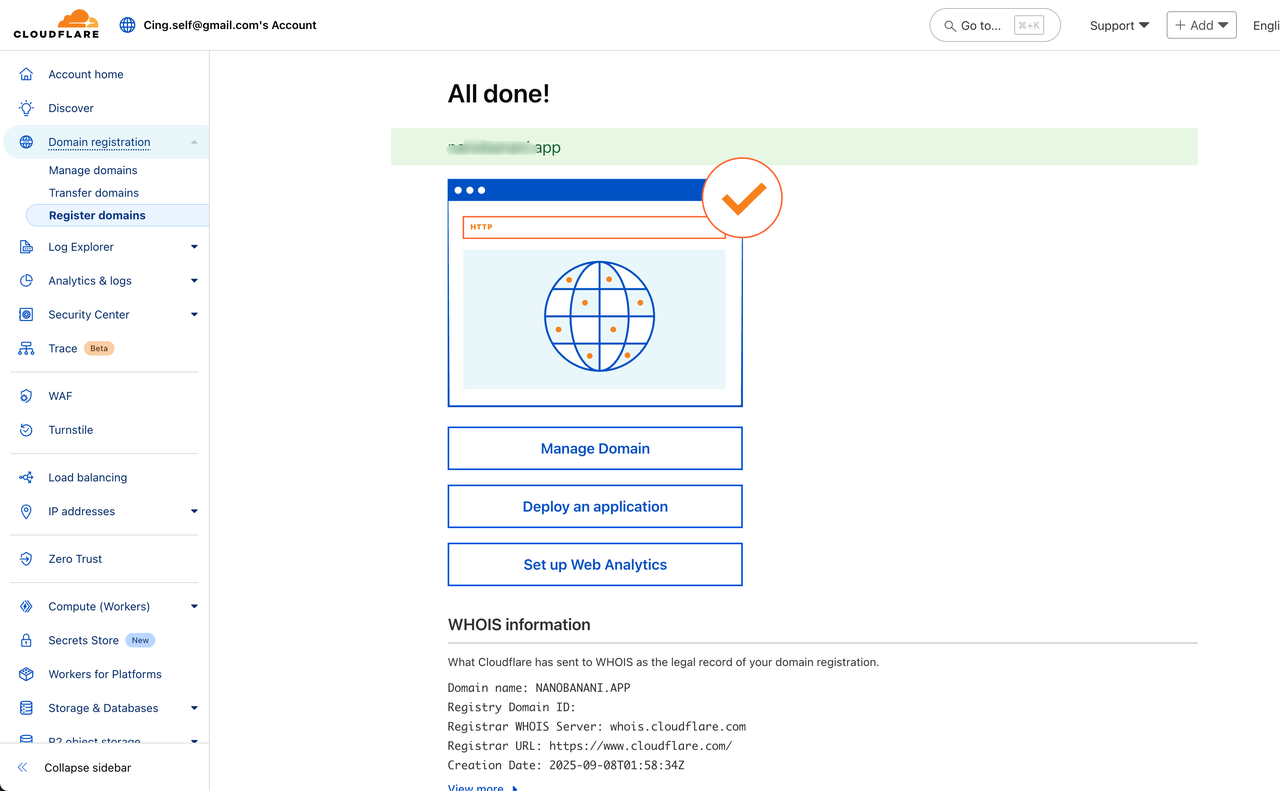
After payment, you’ll be redirected to a page like this.
In my case, I purchased a .app domain for $14, as shown below:
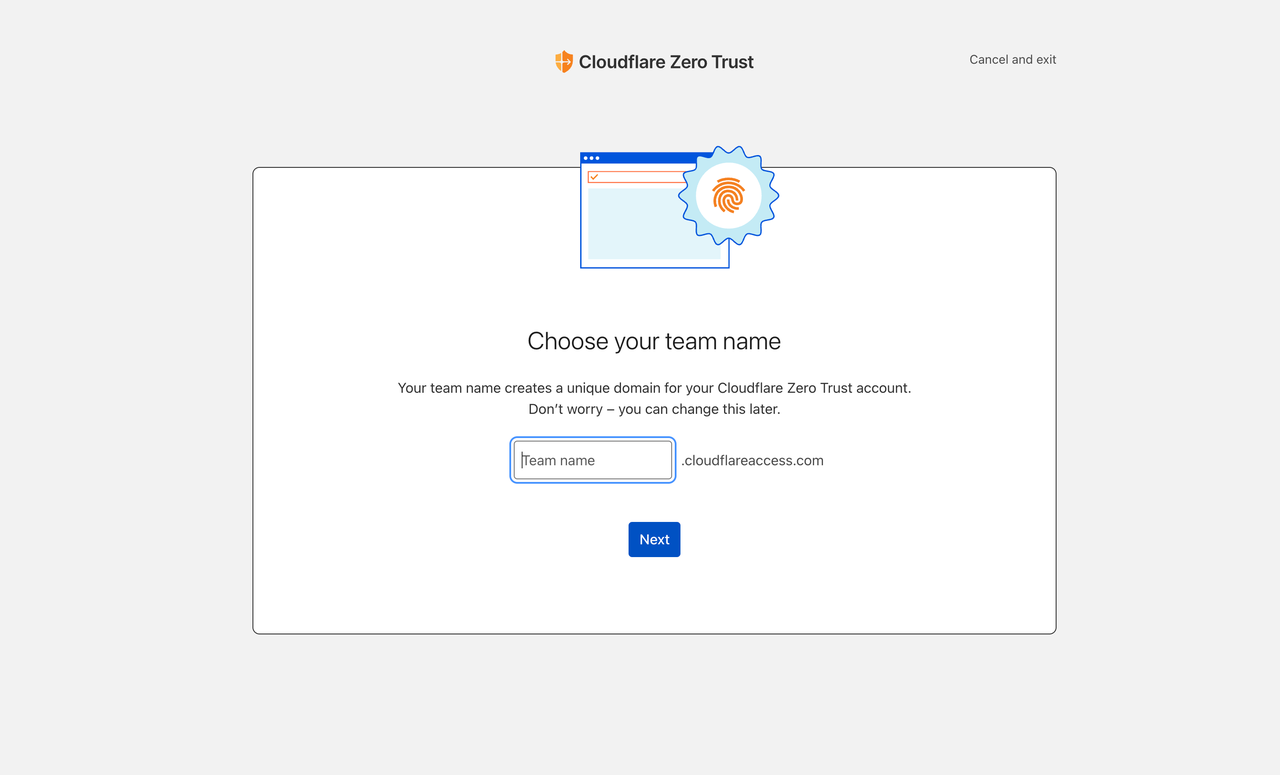
Step 3: Create a Tunnel with Zero Trust
Click Zero Trust in the left menu and enter a Team name.
This name can be anything — it has no direct relationship with your domain.
After entering it, click Next.
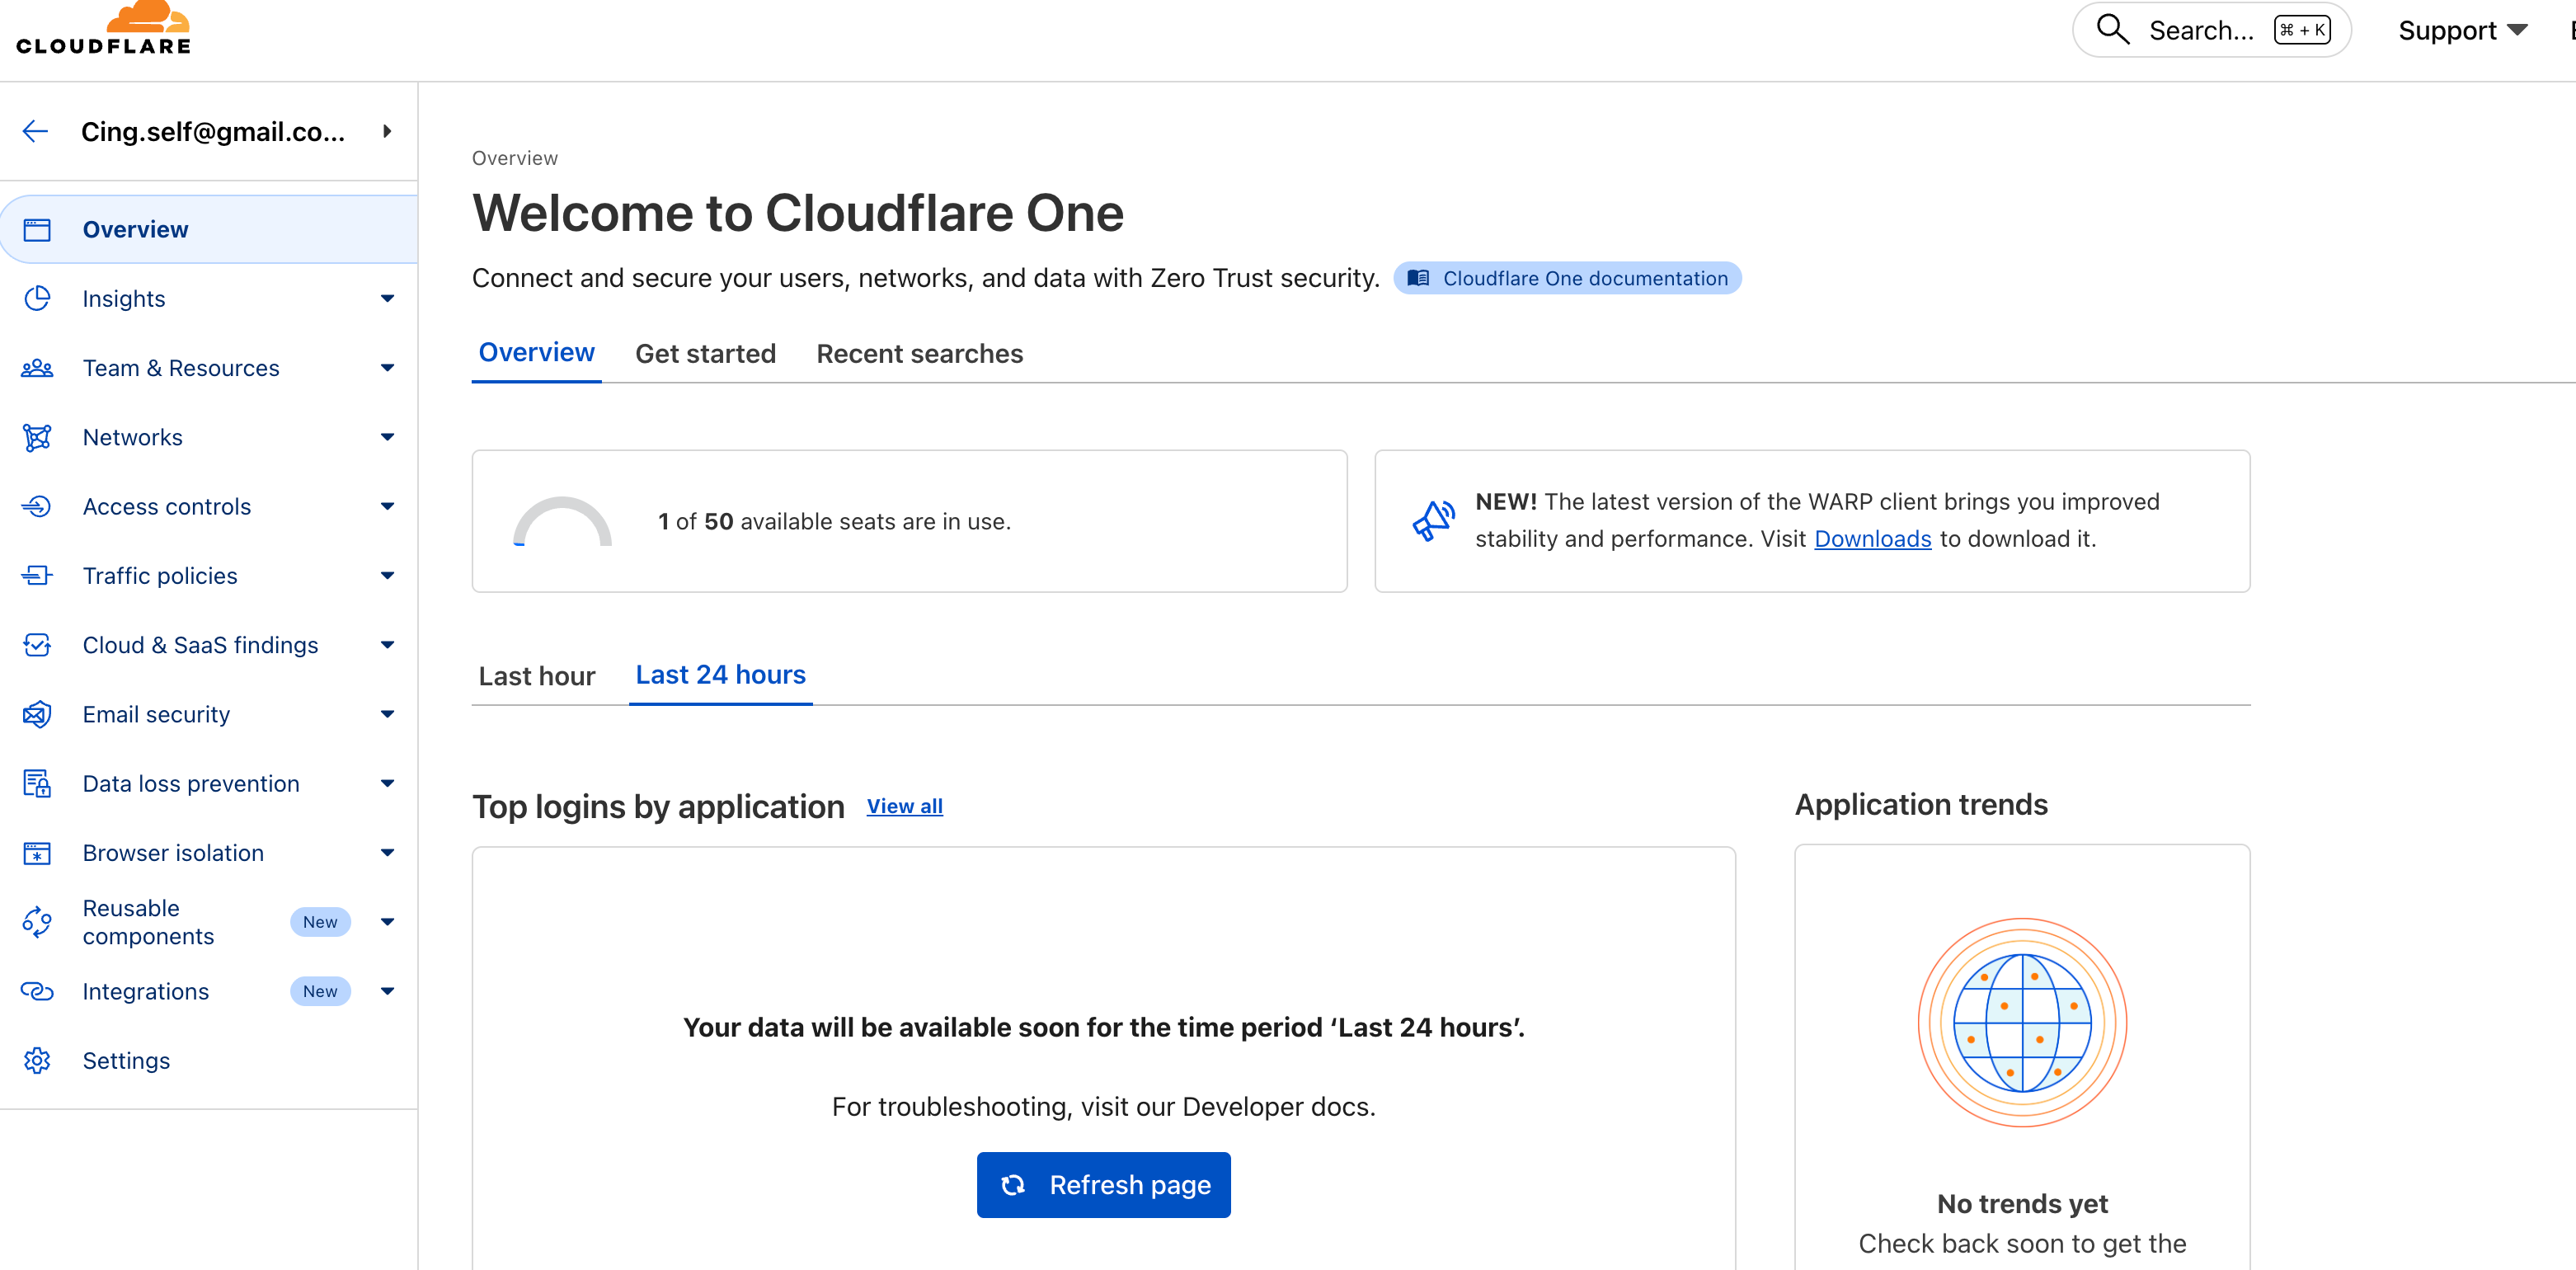
Select the free plan, and you’ll be taken to the next page.
Next, go to Network → Connectors from the left menu.
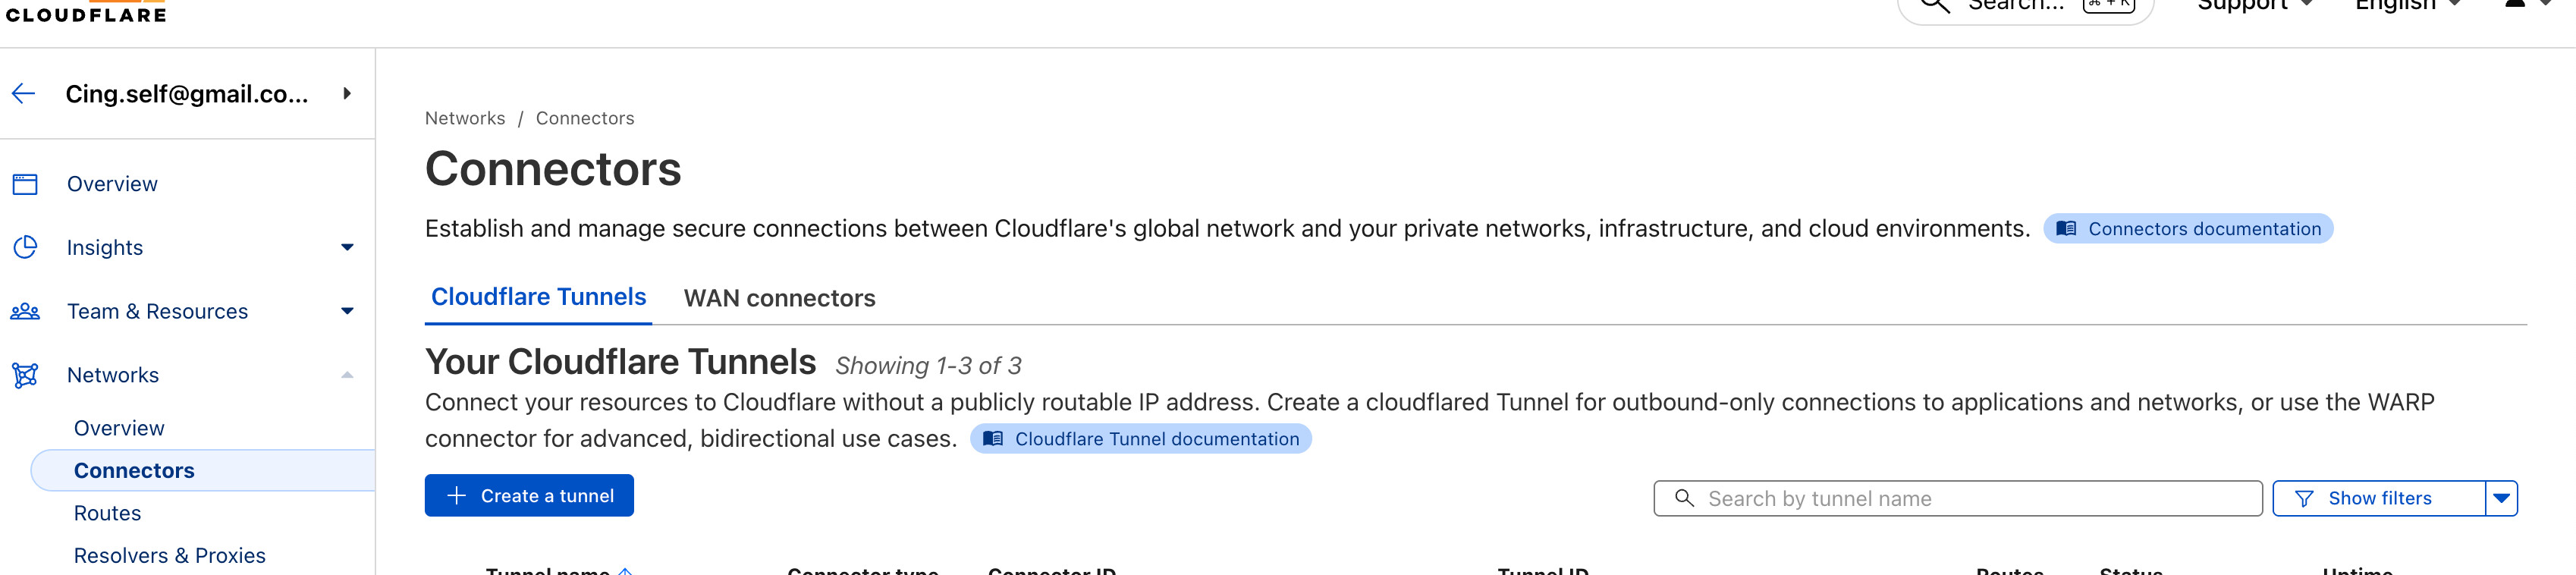
Click Create a Tunnel → select Cloudflared.

Enter a Tunnel name.
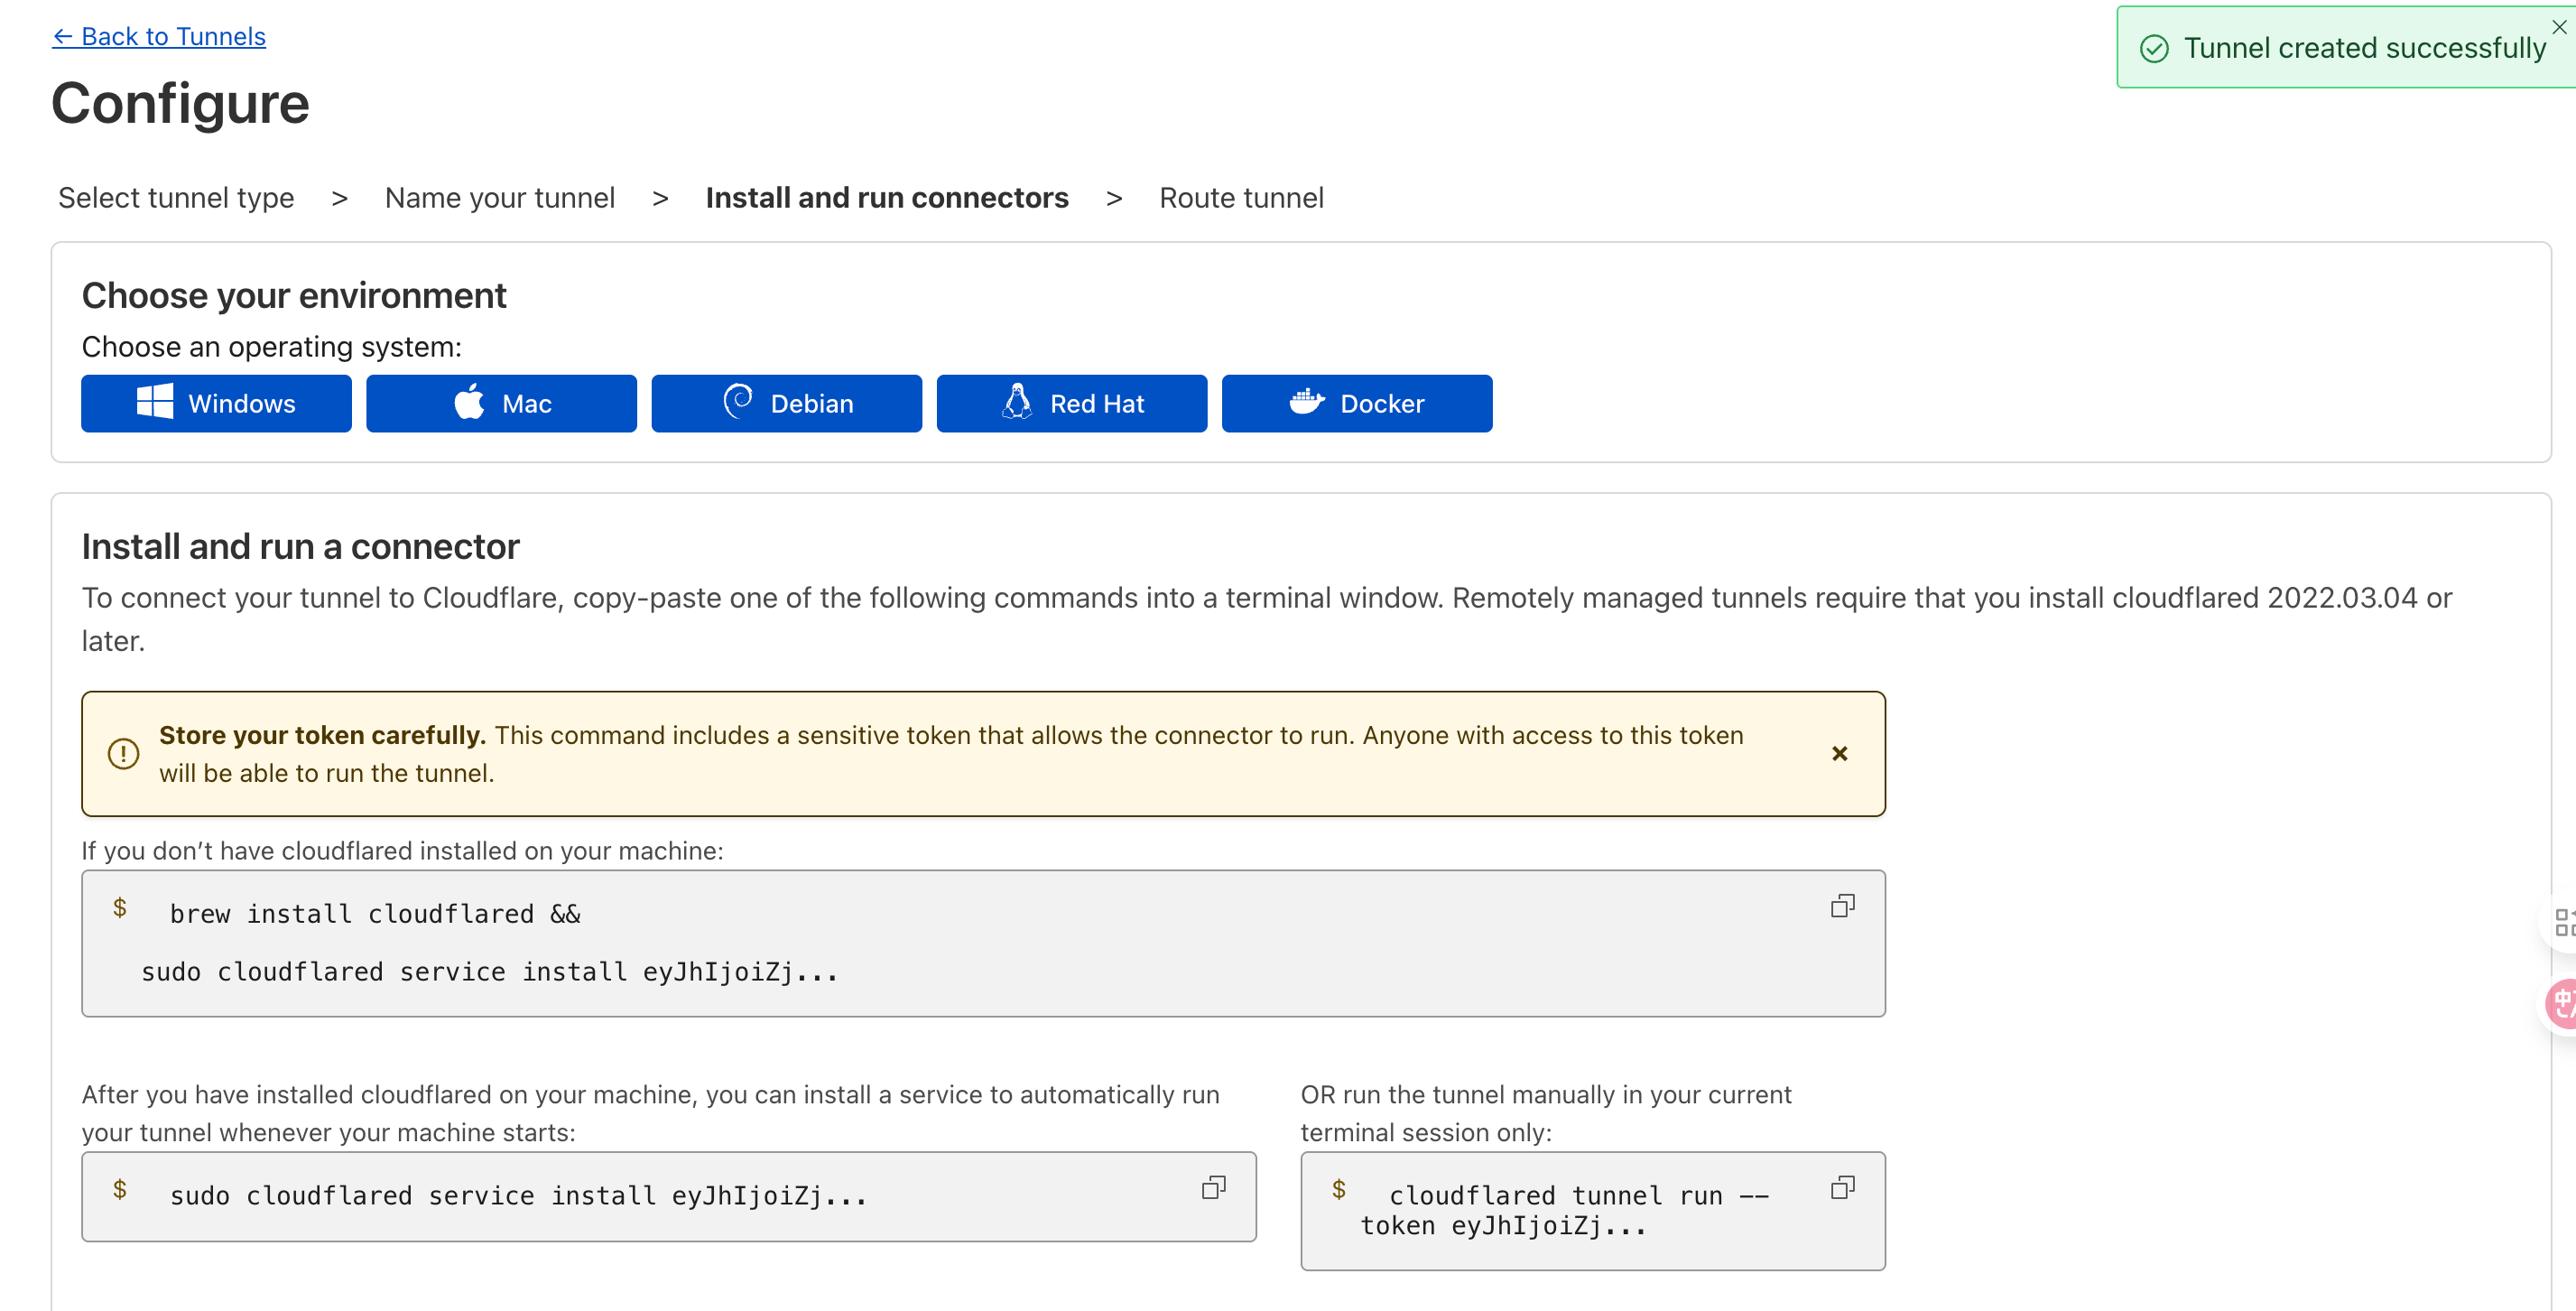
After that, choose the instructions based on your operating system.
Since we already installed cloudflared in the free version, you don’t need to download it again.
Simply copy one of the following commands:
Command 1 (Install as a service – runs automatically on system startup):
sudo cloudflared service install eyxxxxx
Command 2 (Run manually in the current terminal session):
cloudflared tunnel run --token eyJxxxxx
Step 4: Bind the Domain to Your Local n8n
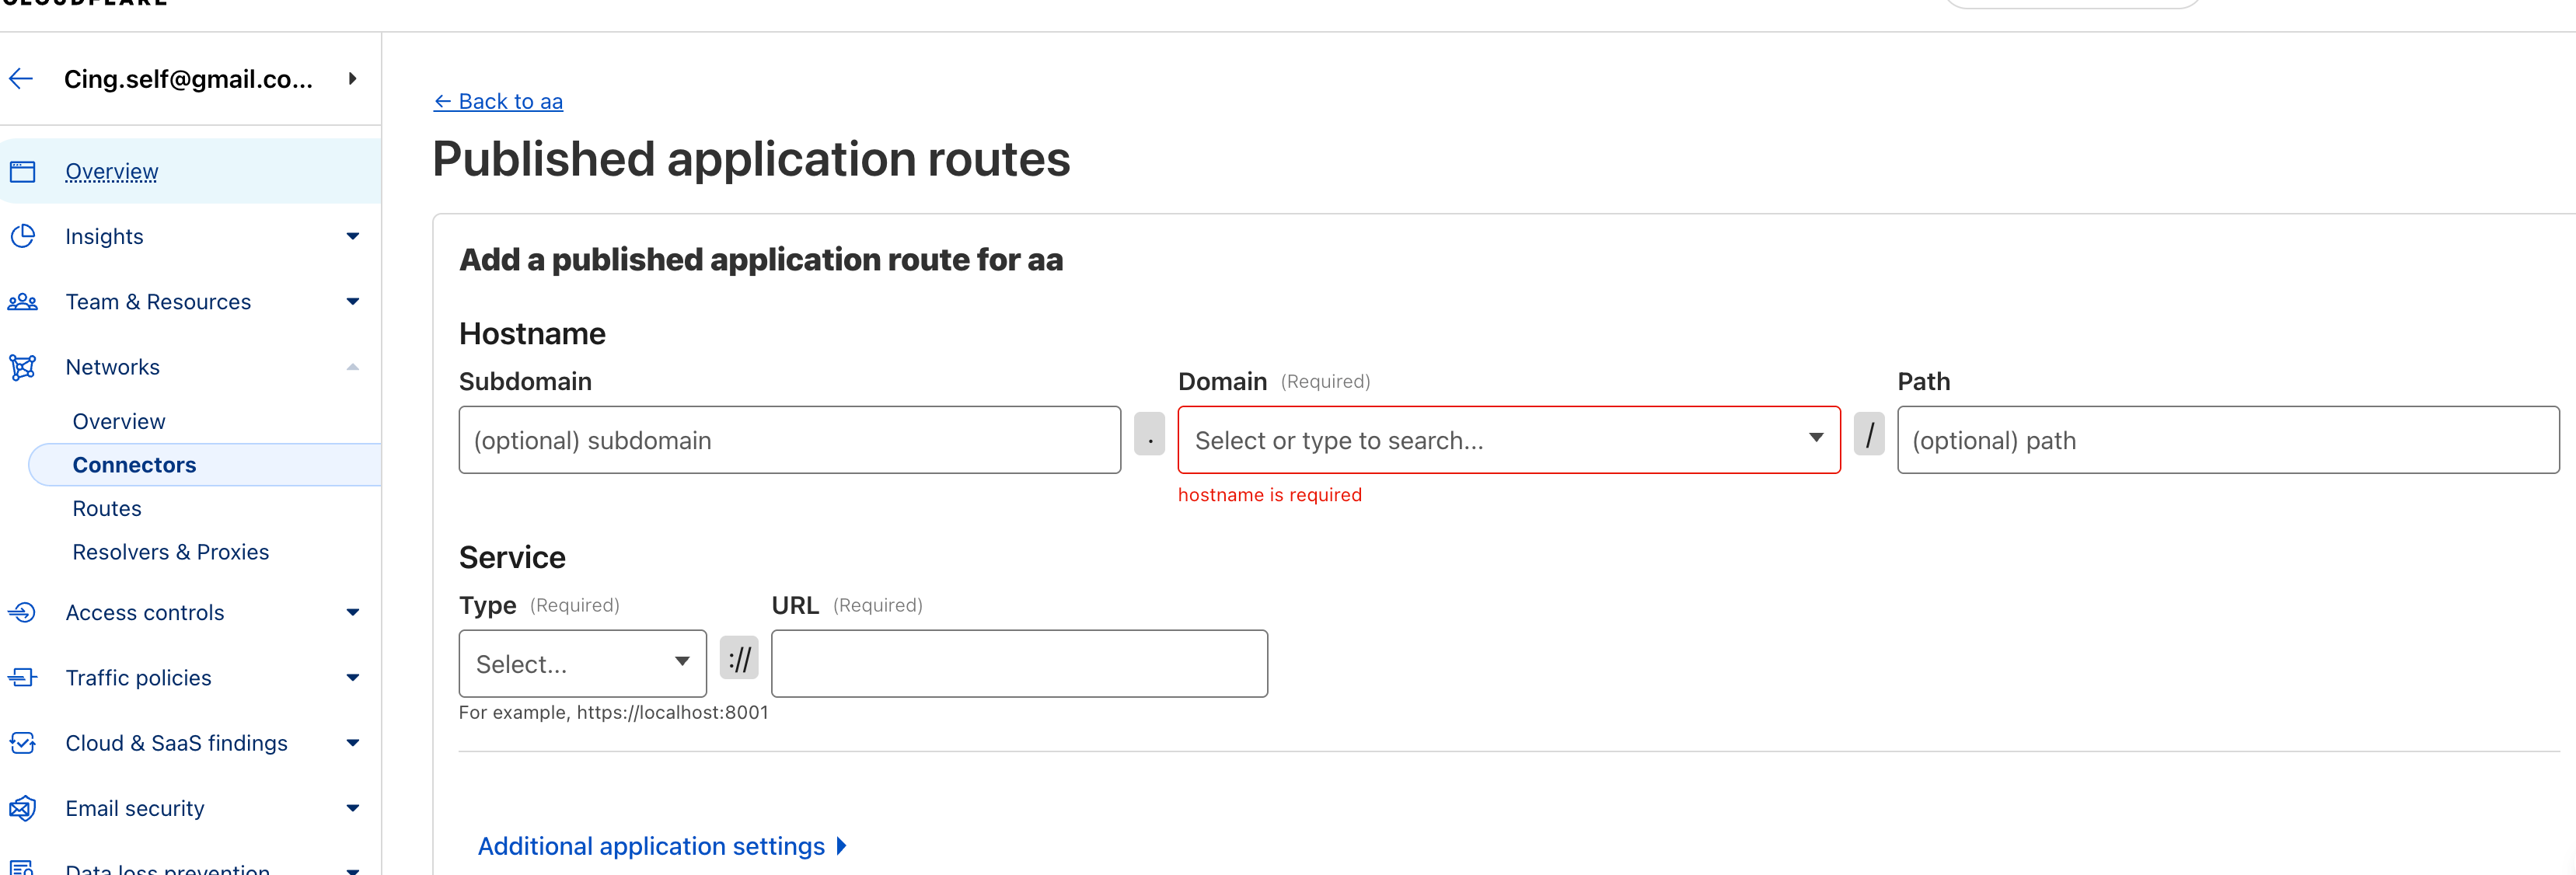
Go to Tunnels → Configuration → Public Hostname, then click Add a published application route.

Select your purchased domain as the Domain.
For the Subdomain, I used local-n8n.
Set the Type to HTTP, and enter your local n8n address as the URL
(in my case: localhost:5678).
Then click Save.
Finally, you’ll see a new hostname in the public hostname list.
This domain now points directly to your local n8n service.
Opening the domain in your browser will take you straight to your local n8n instance.
Adding an Extra Security Layer
With the custom domain approach, we’ve only created a basic tunnel so far.
By default, anyone who knows the domain can access it.
If you want to restrict access — for example, only allowing specific email addresses — you can use Cloudflare Access Policy.
Still on the Zero Trust page, go to:
Access Controls→ Applications → Add an application → Self-hosted
Fill in the required information:
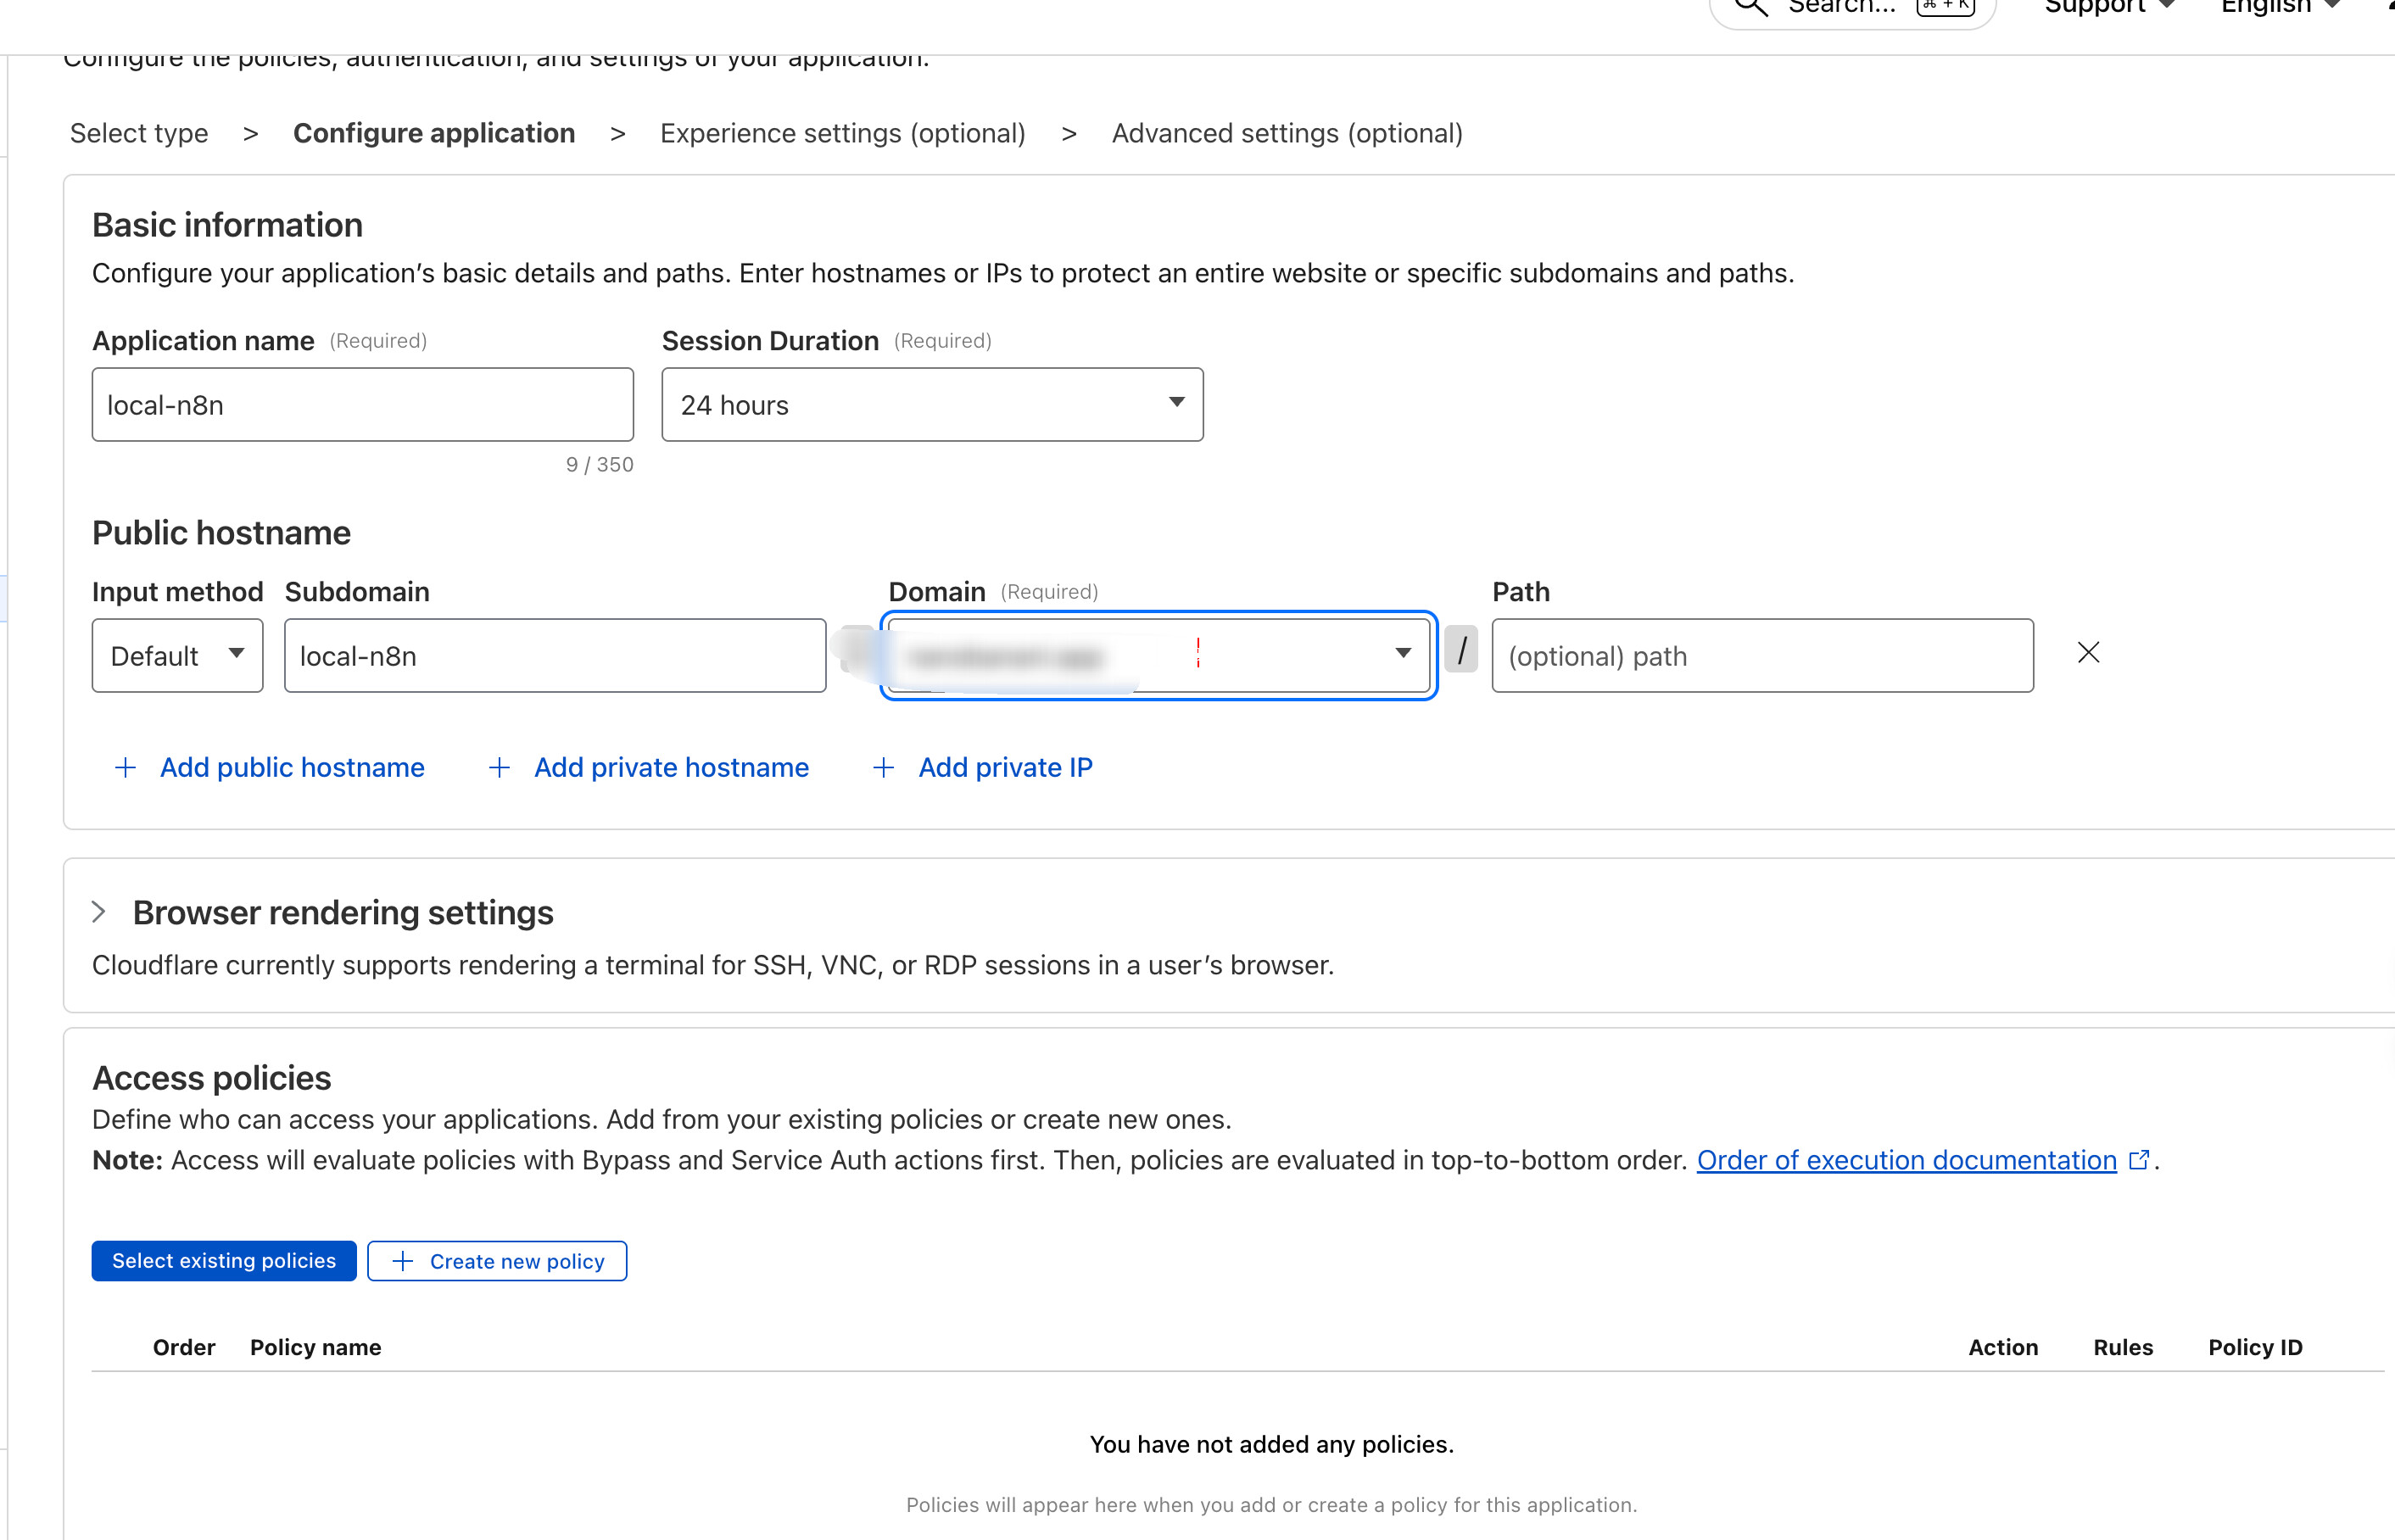
Then click Create new policy.
In my case, I restricted access by email, meaning only specified email addresses can log in.
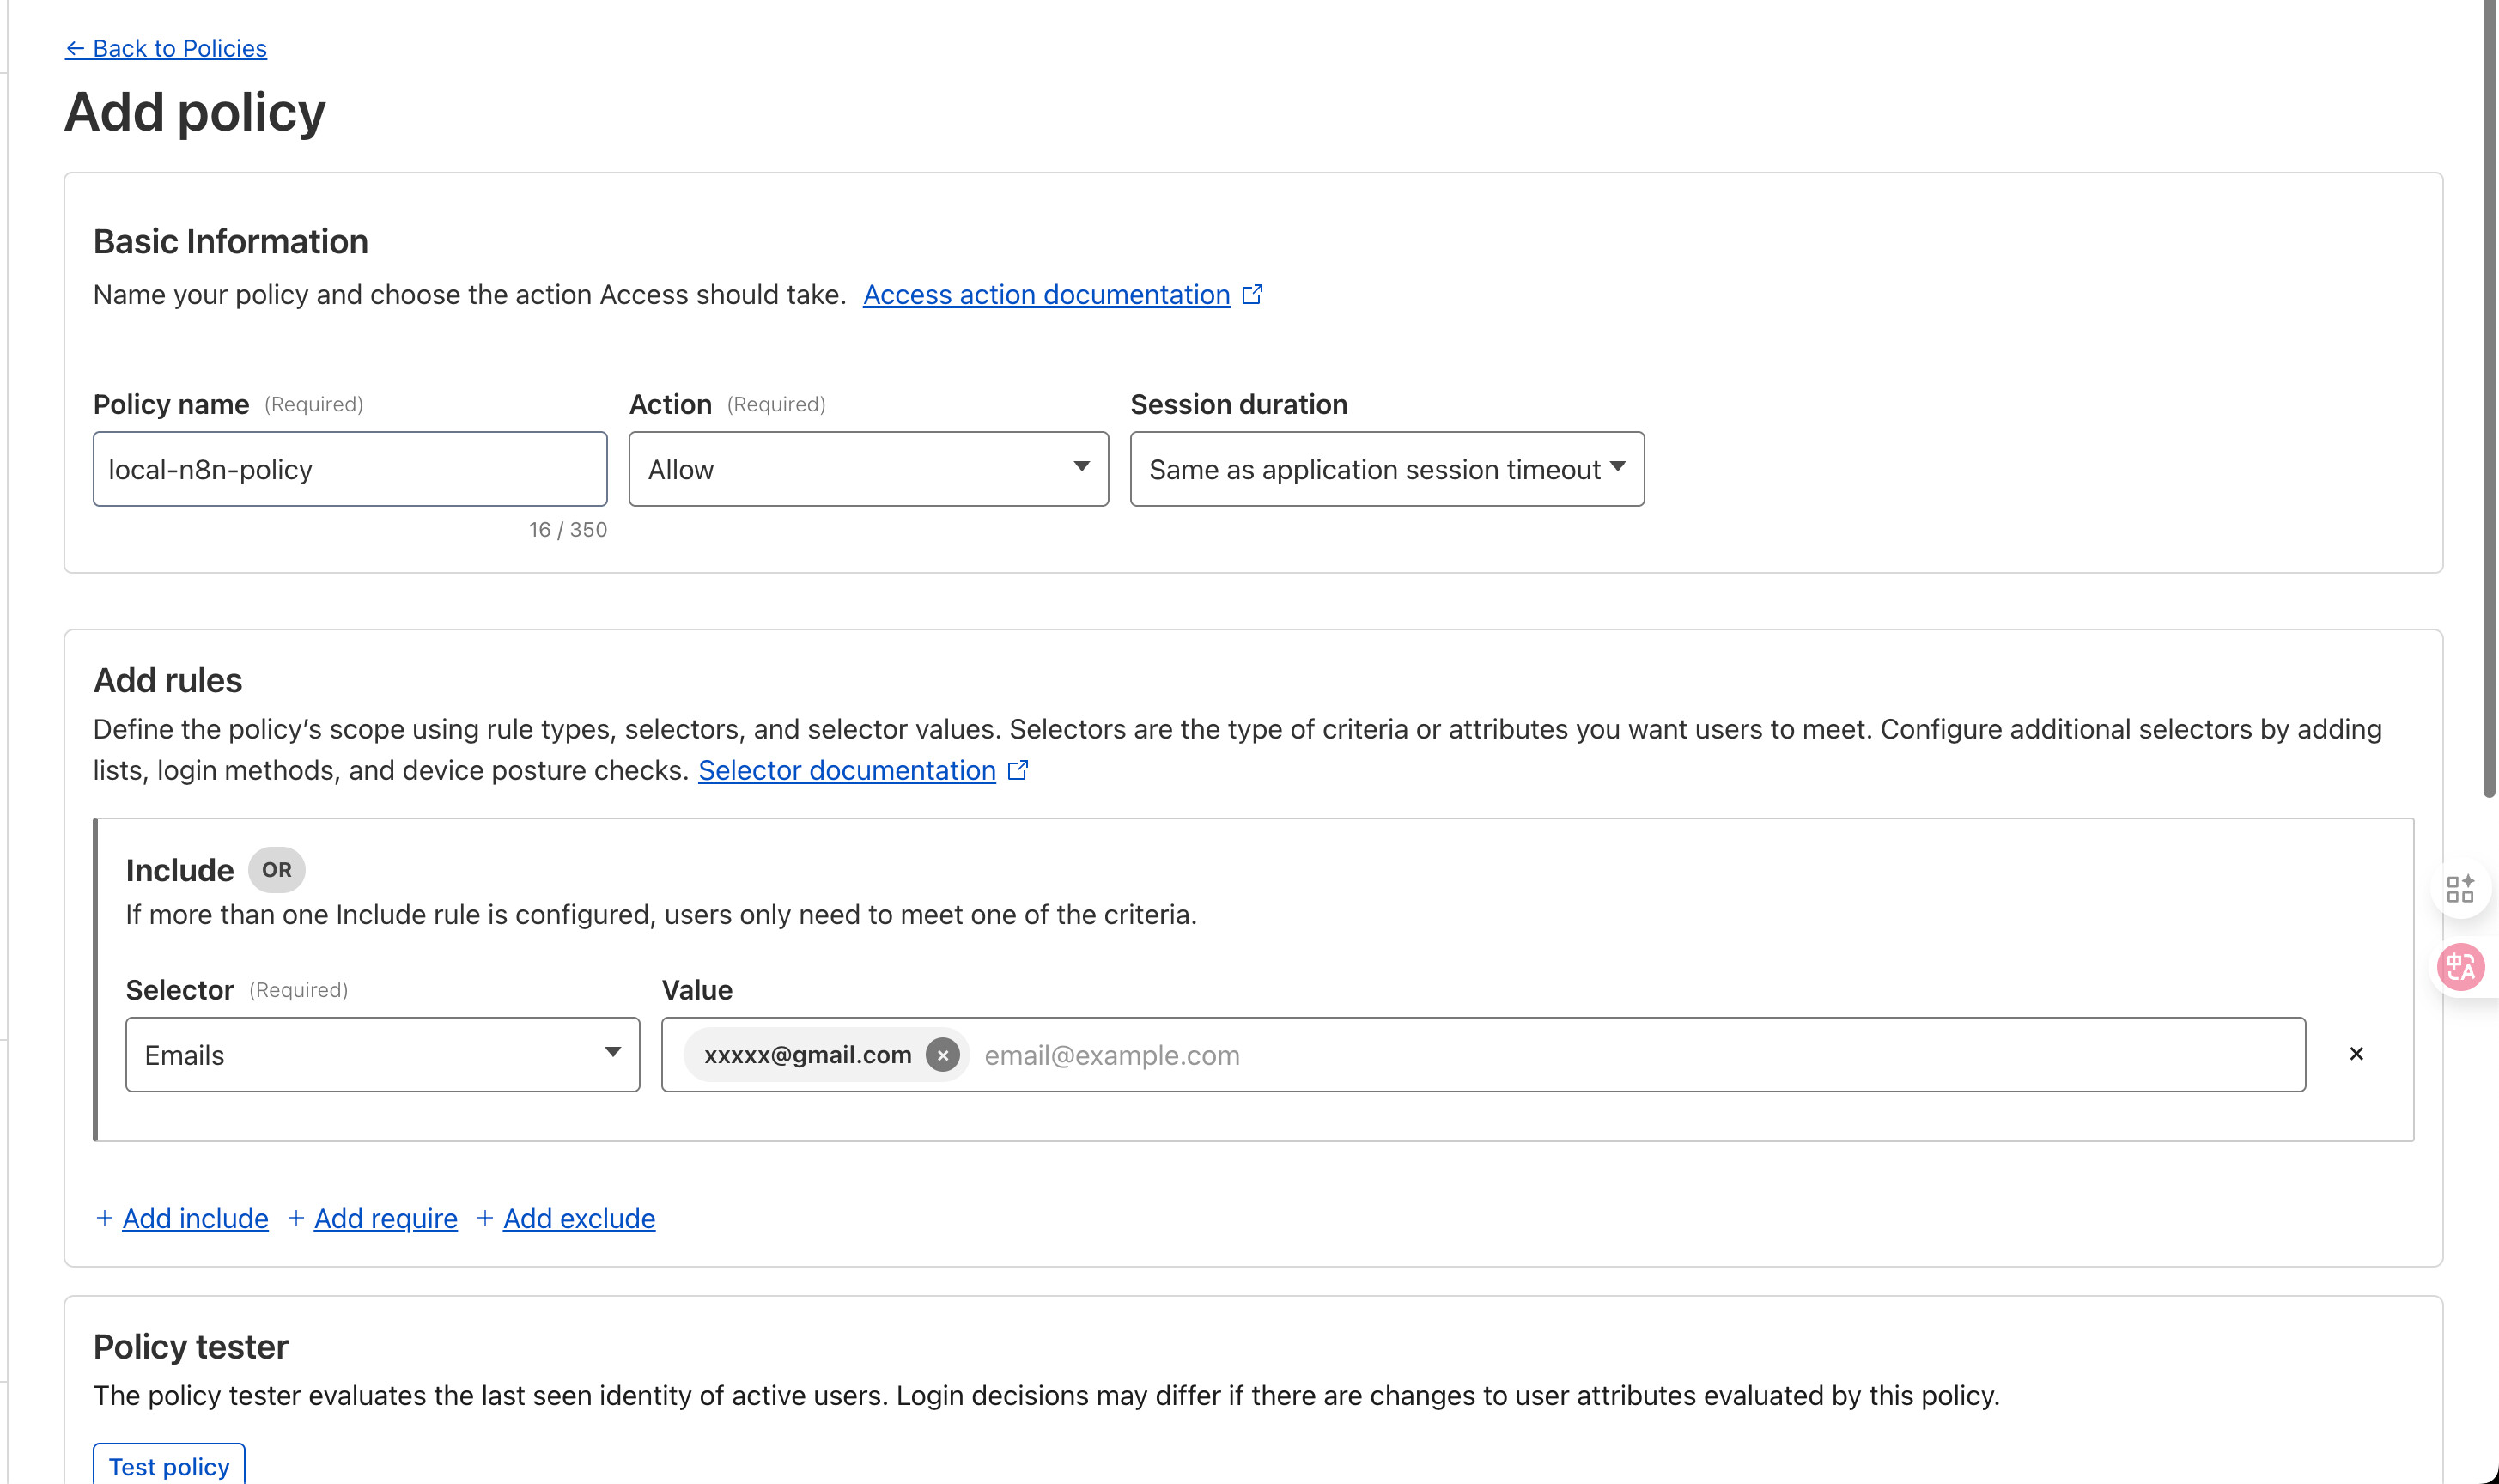
After saving the policy, return to the application settings page, select the policy you just created, then click Next (leave other options as default), and save.
Accessing the Protected Domain
Now, when you visit local-n8n.xxxxx.app, you’ll see a login page like this:
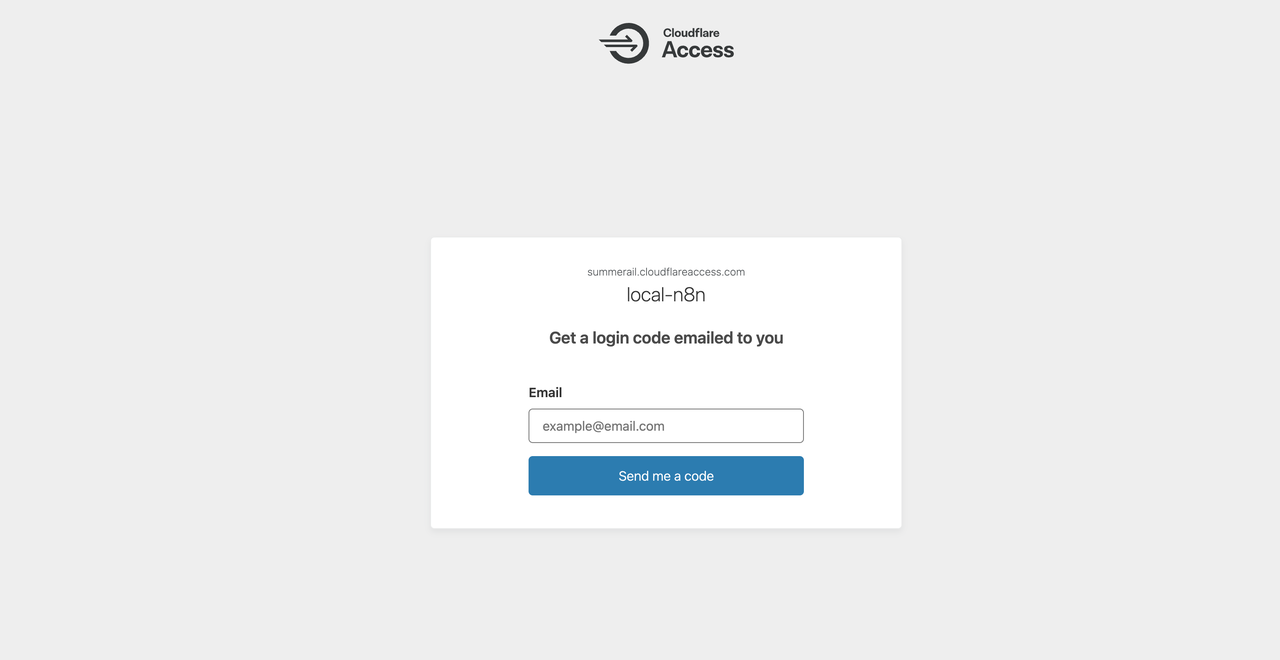
Enter the email address you configured in the policy and click Send me a code.
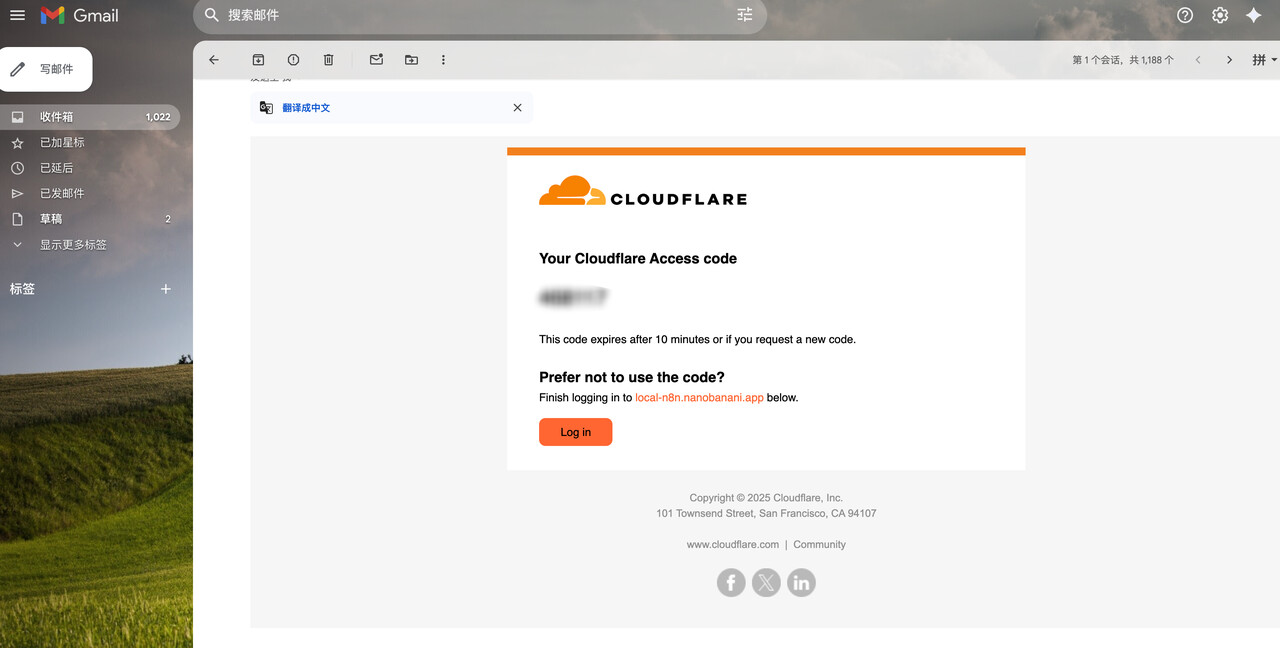
You’ll receive a verification code in your email.
Enter the code, and you’ll be granted access.
Once logged in successfully, as shown below:
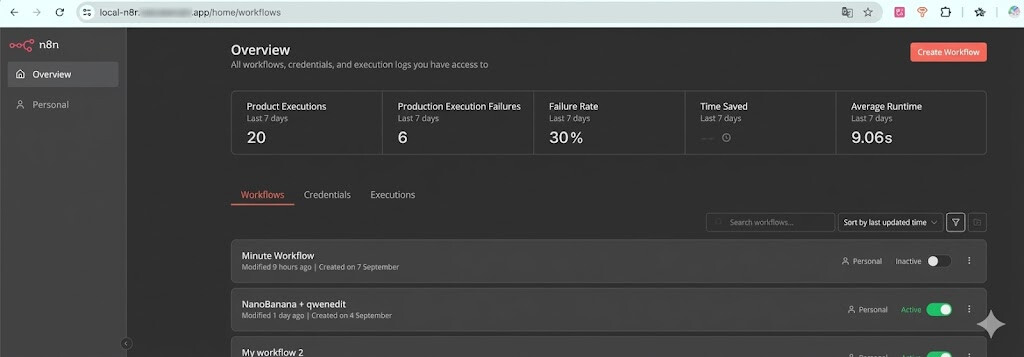
As long as the cloudflared tunnel is still running on your computer,
this domain will continue to provide access to your local n8n service.
Conclusion
The main reason I set this up is simple and very practical.
I needed to connect my local n8n instance with other platforms — webhooks, third-party services, and external systems.
To make that work, I needed a publicly accessible domain that points to my local n8n.
Cloudflare gives me exactly that.
With Quick Tunnel, I can expose n8n instantly for testing and short-term integrations.
With a custom domain and Zero Trust, I get a stable address that I can safely rely on for long-term use.
Once you have a public domain, your local n8n is no longer isolated.
It becomes part of a larger system — able to talk to other platforms, receive events, and trigger real workflows.
That’s the real value of this setup.